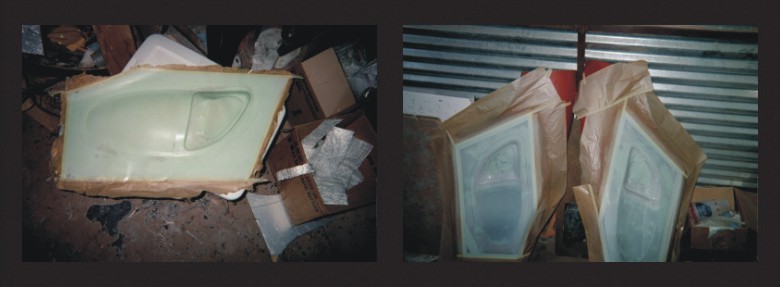
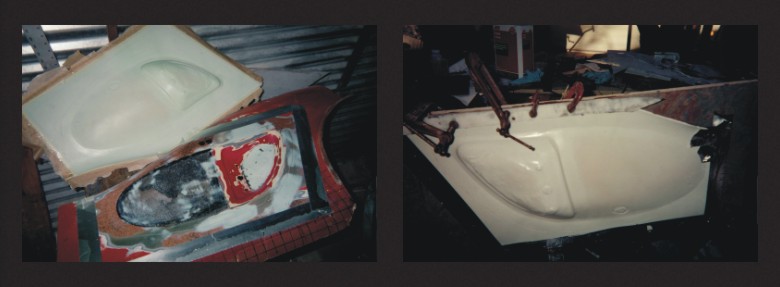
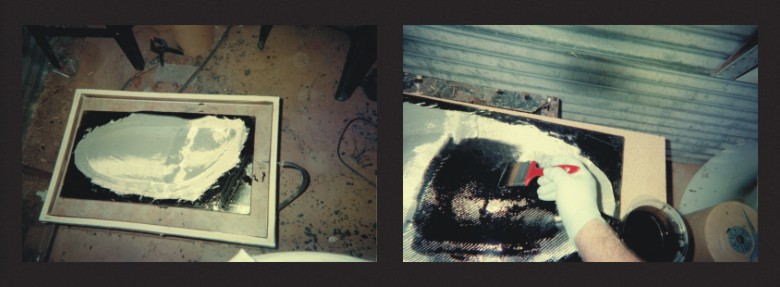
Above: The molds
were waxed and a
thin coat of PVA was
sprayed on. Next
since I didn’t have
any gel coat, I used
regular resin
thinned with acetone
and sprayed through
a primer spray gun.
I added white
pigment and spayed
three coats, letting
each coat set up
tacky before I
sprayed the next.
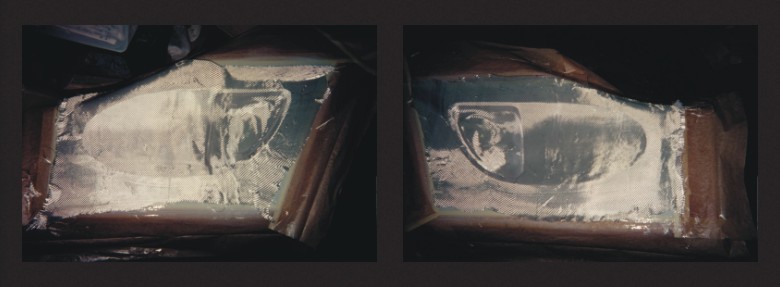
Above: When the
third coat of resin
had set up, but was
still tacky, I
laid in a special
satin weave
fiberglass cloth
used in making
spheres and other
intricate fiberglass
aircraft parts. This
cloth will follow a
contour without
bunching up or
folding.
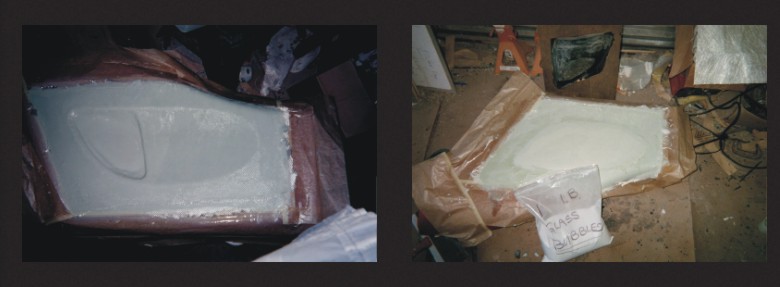
Above: When the
third coat of
fiberglass and resin
had set up, I mixed
up a batch of resin
with 50% by volume
of hollow glass
balls and some
chopped fiber glass
for filling in the
center.
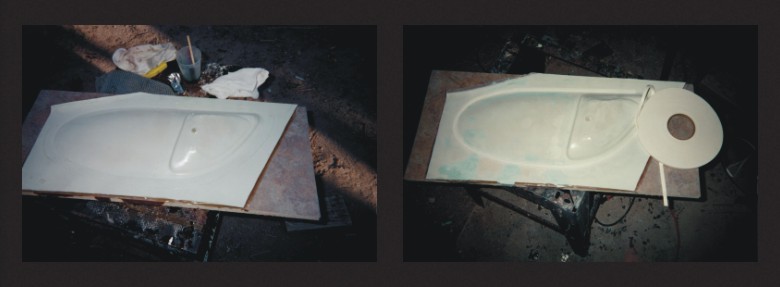
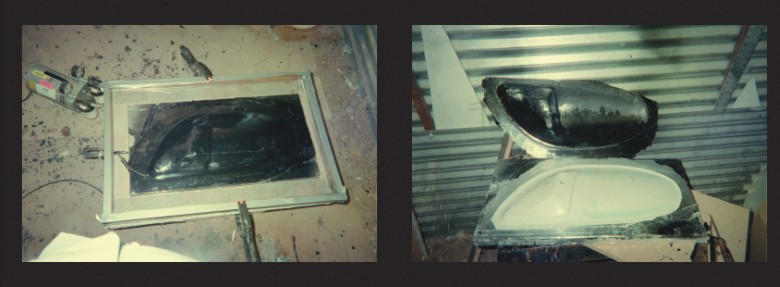
Above: Once the
cavity was full, I
added several layers
of fiberglass mat
for strength. The
next day I removed
the shape from the
mold.
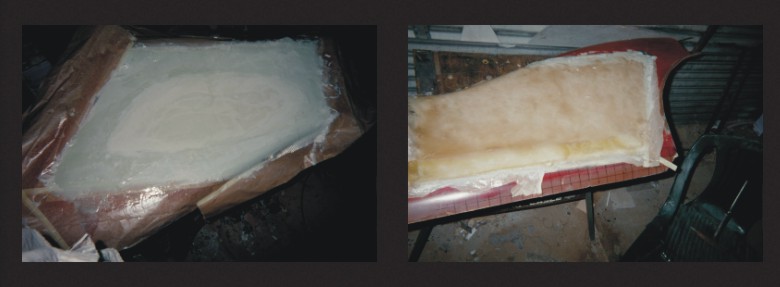
Above: The next day
I removed the shape
from the mold and
mixed up a layer of
matt and resin and
glued and clamped it
to a piece of one
inch thick particle
board to keep it
flat.
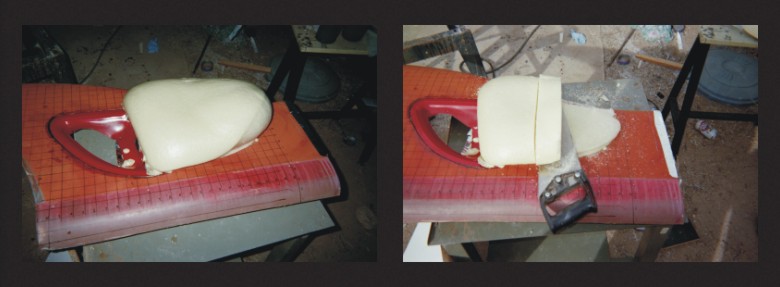
Above: Once the mold
was secured to the
backing, I made a
perimeter of 1/8”
foam tape to get the
thickness I needed a
lip to glue the
scoop in place with.
See illustration
below.

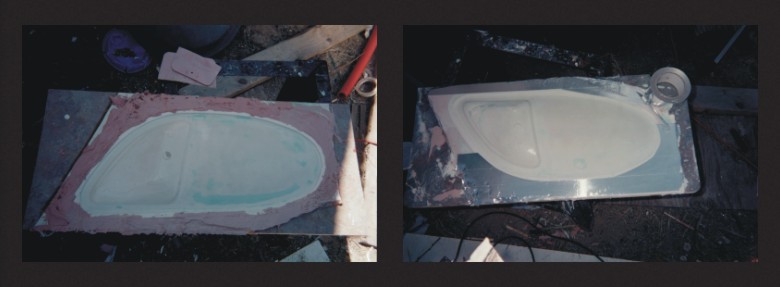
Above: I filled in
around the 1/8 foam
tape with 1/8” Bondo,
sanded smooth and
covered with 2” wide
aluminum tape.
(resin does not
stick well to
aluminum tape.) Once
the Bondo was dry I
removed the foam
tape using Lacquer
thinner and a small
putty knife
Time to make the
actual scoops
Below
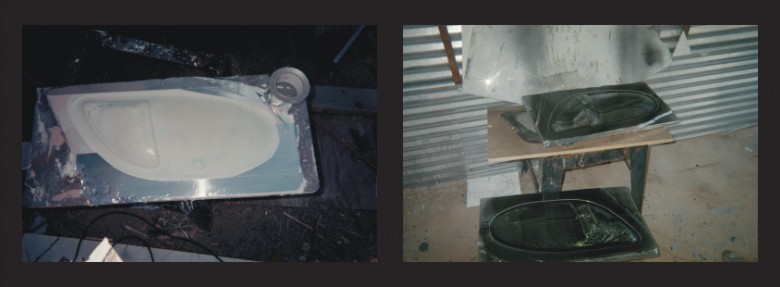
Above
right: I covered all
my bondo work with
aluminum tape. The
molds were waxed and
a thin coat of PVA
was sprayed on. Next
once again I didn’t
have any gel coat,
so I used regular
resin thinned with
acetone and sprayed
through a primer
spray gun. I added
black pigment and
spayed three coats,
letting each coat
set up tacky before
I sprayed the next.
Above: When the
third coat of resin
had set up, but was
still tacky, I laid
in the special satin
weave fiberglass
cloth used in making
spheres. This cloth
is really amazing
for following a
contour without
bunching up or
folding. I then
brushed on black
pigmented resin with
a brush.
Above: while still
wet, I immediately
put everything in my
vacuum frame with a
polythene sheet and
used my vacuum pump
to pull out all the air and to make a
good tight seal
while the resin set
up. I did three
layers of fiberglass
and resin vacuuming
each before taking
the parts out of the
mold.
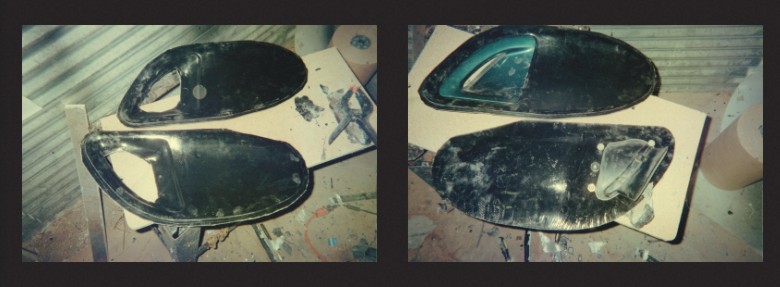
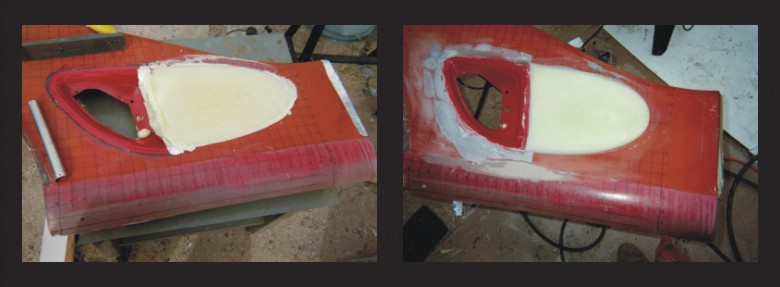
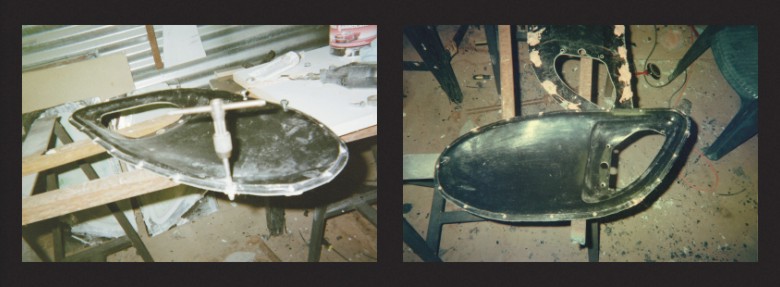
Above: I then cut my
parts out with a die
grinder and drilled
my holes for the
mustang scoop
inserts. Then I made
sure everything fit
correctly.
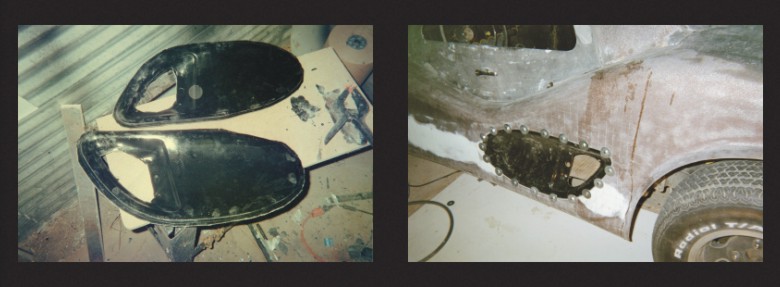
Above: I evenly
spaced 18 1/4”-20
square nuts on the
back side perimeter,
gluing them down
with resin. To make
it even stronger I
mixed a batch of
Bondo and put that
over each nut and
let dry for a day.
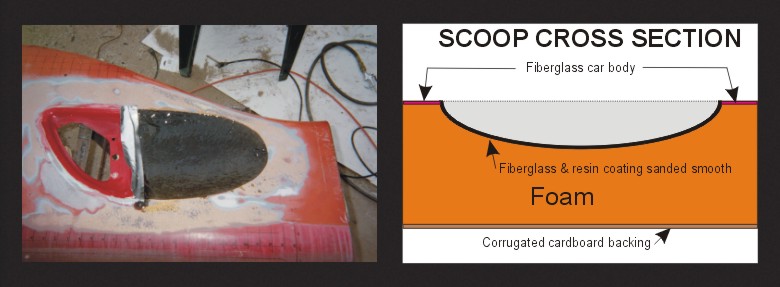
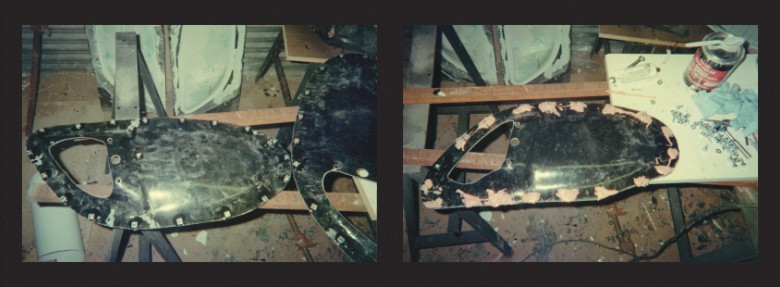
Above: after the
Bondo had cured hard
I cleaned out the
holes with a drill
and ran a 1/4” -20
tap to clean out any
excess Bondo. Now we
are ready to mount h
the scoops in the
car.
Time to install the
scoops on the car
Below:
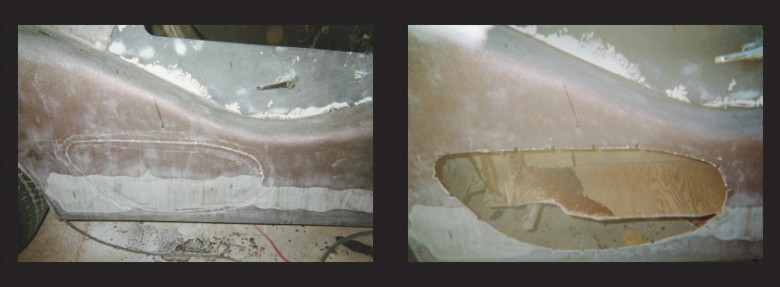
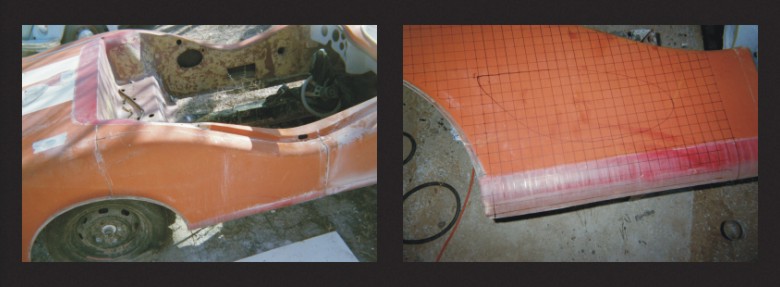
Above: I made a
pattern off my mold
and marked the side
of the car where the
scoop was to be
installed. I used a
saber saw to cut the
hole. Then I drilled
holes to match where
the holes were on
the scoop.
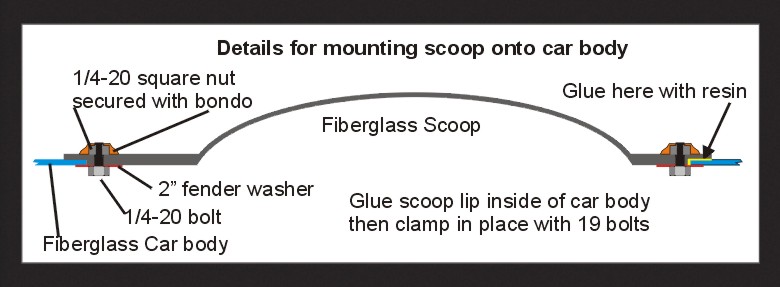
Above: I pushed the
scoop inside the
body and pulled it
tight against the
lip on the scoop.
Then I mixed up some
resin and glued the
scoop to the inside
of the car body. I
then quickly screwed
in my 1/4”-20 bolts
and fender washers
to hold the scoop in
place while the
resin set up.
See
diagram below.
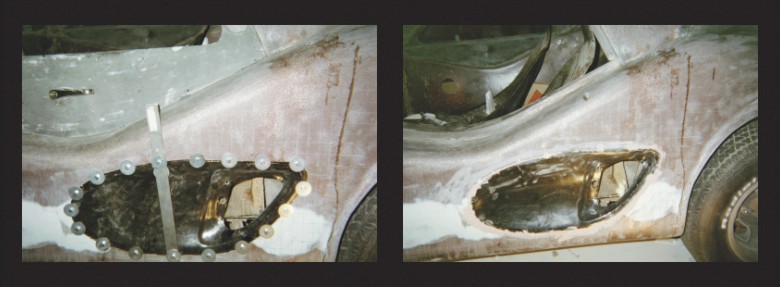
Above: The bolts
kept the scoops
flush with the body
while the resin set
up. I then removed
all the bolts and
filled the holes
with body filler. I
then finish sanded
everything smooth
and used a thin
layer of glazing
putty to finish it
off.
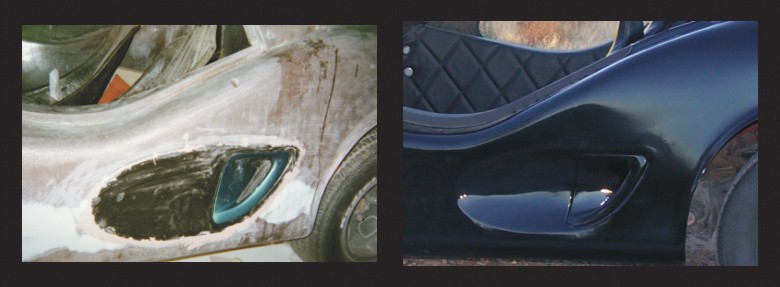
Above: After the
Bondo had cured hard
I made sure the
scoop insert fit
correctly. I then
filled both sides of
the car the behind
the scoops with two
part polyurethane
foam for strength.
Photo on the right
shows what the
scoops look like
after the car was
painted. From start
to finish the scoops
took almost a year
to fabricate and
install.